DIY Statement Necklace
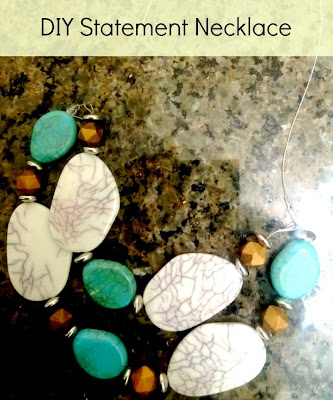
Statement necklaces are one of the hottest accessories today and I have seen numerous necklaces that I’d love to own. However, many of the necklaces that I truly like were simply too cost prohibitive for me to purchase. When Walmart asked me to come up with a fun summer craft I decided to make my own statement necklace with items available at Walmart. To truly appreciate this endeavor, you must know that I am not experienced with jewelry making. I have made a necklace and earrings in the past but it was pretty much a choose pretty beads and thread them on leather.
In this instance, I actually developed a concept for the necklace and executed. Quite honestly, I know that my technique leaves room for improvement and perhaps I should have watched a few jewelry making videos before attempting to make my own necklace BUT I am still happy with the results.
To start, I took a visit to Walmart and purchase a few necessary items, I found 3 strands of turquoise beads that were $4.00 each with the exception of the strand with only turquoise and that was $6.00.
Next I found a “complete” jewelry making kit that included pliers for cutting and shaping wire as well as crimping tubing. The kit also had wire, crimping tubes, earring hooks, lobster claws and toggle closures. Finally it has a measuring guide, a place to hold beads and a small guide that provides some instruction on how to make jewelry.
My idea was to make a layered three strand necklace with a toggle closure. I started by measuring around my neck to determine where the last strand of beads would fall. Next I measured wire to hold my 1st strand of beads and tether the additional two strands for the final product.
Threading the large beads was simple and for my second strand I measured the length of the ones I wanted to use and thread them on wire. Next I made loops at the end of the strand so that I could thread the main wire. I found that instead of using the pliers, I simply twisted the wire by hand. I realized later that I probably should have just used a crimping tube to make the loop and finish it but this project was all about trial and error so now I know for next time. I repeated the process with the third strand but when I put the necklace on my neck to see if it was the correct length, it was clear that the three strands would not lay properly. I removed the third strand and finished the necklace with a crimping tube on both ends and I added the toggle closure.
I really like the finished product but since it was my first time out, I’ve learned how to improve my jewelry in the future. I am super excited about having the tools I need to make more jewelry and now it is just a matter of coming up with ideas and finding beads/accessories that I want to use in the future.
Have you ever made jewelry? Do you have any tips for me?


Comments